
There’s nothing like the smell of a freshly baked apple pie recipe wafting through the kitchen, especially when it’s done right. If you’ve been hunting for that one apple pie recipe that checks all the boxes — flakiness, sweetness, and a perfect balance of spices — you’re in the right place. We’ll break down every part of the pie-making process, from selecting the best apples to troubleshooting any pie-related disasters. Let’s get baking!
Introduction
You want the best apple pie recipe? We’ve got it. Whether you’re a seasoned baker or just stepping into the kitchen, this guide will turn you into an apple pie aficionado. We’ll not only give you a recipe but walk you through expert tips and techniques. You’ll never look at apple pies the same way again!
The Best Apples for Apple Pie
Apples can make or break your pie, so let’s get this right. Some apples turn into mush, while others hold their shape and offer that perfect balance of sweet and tart. Here’s a cheat sheet for selecting your apples:
| Apple Variety | Texture | Flavor | Best Use |
|---|---|---|---|
| Granny Smith | Firm | Tart | Keeps its shape, perfect for a bold pie |
| Honeycrisp | Crisp | Sweet and tart | Offers a balanced flavor and great texture |
| Golden Delicious | Soft | Sweet | Best when mixed with tart apples |
| Jonagold | Soft-crisp | Sweet-tart | Adds complexity to any filling |
| Braeburn | Crisp | Sweet-spicy | Ideal for those who love a spicy kick |
Pro Tip: Use a mix of apples to balance tartness and sweetness. It’s the secret to a rich and layered flavor profile.
How to Make the Perfect Pie Crust
Ah, the pie crust—the foundation of a great apple pie recipe. We want it flaky but not too crumbly, buttery but firm. Here’s how you nail that balance:
- Ingredients:
- 2 ½ cups all-purpose flour
- 1 cup unsalted butter, chilled and cubed
- 1 tsp salt
- 1 tbsp sugar
- 6-8 tbsp ice-cold water
- Method:
- In a large bowl, whisk together flour, salt, and sugar.
- Cut the butter into the flour using a pastry cutter (or two forks) until the mixture resembles coarse crumbs.
- Slowly add water, one tablespoon at a time, and mix until dough just comes together.
- Divide the dough into two disks, wrap them in plastic, and chill for at least 30 minutes before rolling.
Tip: Keep everything cold. Warm butter = tough crust.
Prepping the Apple Pie Filling
The filling is where the magic happens. It needs to be rich, spiced, and perfectly thickened to avoid a runny mess.
- Ingredients:
- 6 cups thinly sliced apples
- ¾ cup sugar
- 2 tbsp flour (or cornstarch for a thicker filling)
- 1 tsp cinnamon
- ¼ tsp nutmeg
- 1 tbsp lemon juice
- 1 tbsp butter
- Instructions:
- Toss sliced apples in sugar, flour, and spices.
- Drizzle in the lemon juice for a hint of brightness.
- Let the mixture sit for 15 minutes to soften the apples slightly.
Pro Tip: Some bakers pre-cook their apples to avoid shrinkage in the oven. While this adds an extra step, it guarantees even, juicy apples in every bite.
Assembling the Apple Pie
This is where it all comes together. Roll out your chilled dough and get ready to build that masterpiece.
- Roll out the bottom crust: Lay it in a pie dish, letting the excess hang over the edges.
- Add the filling: Pile in the apple mixture, dotting it with butter for added richness.
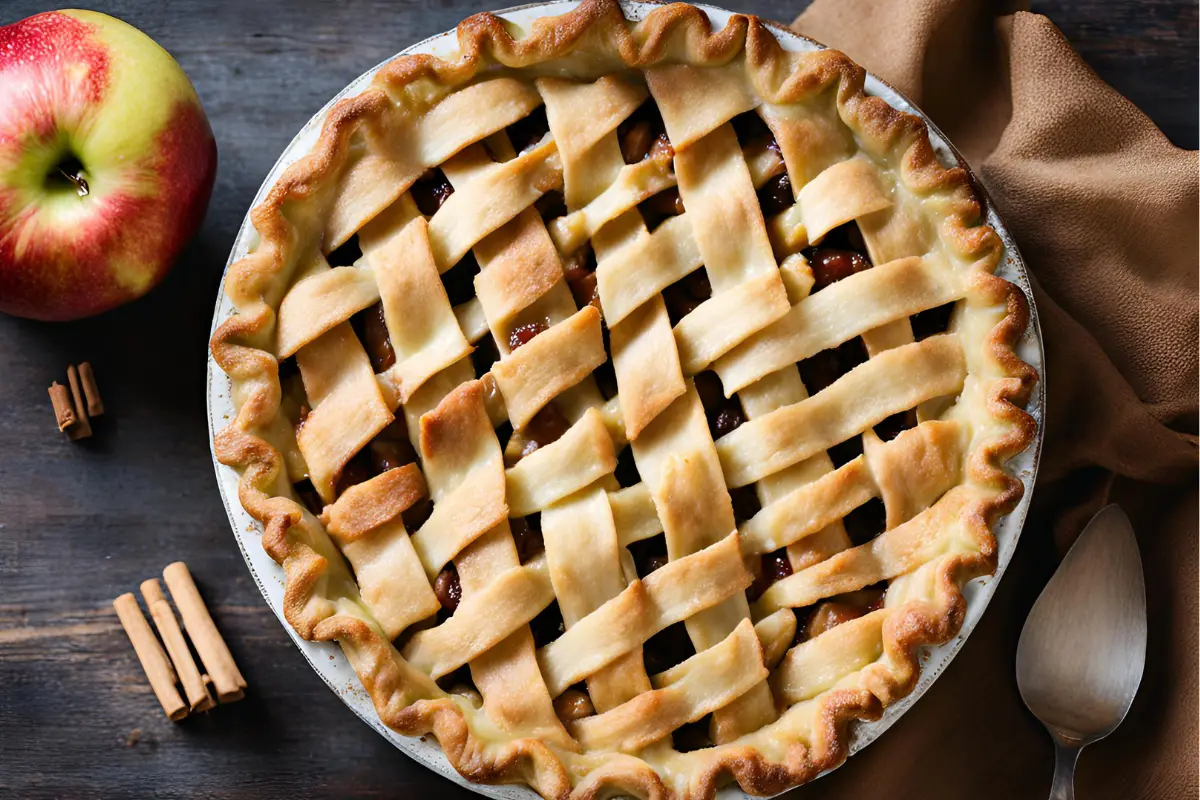
- Top it off: Roll out the second dough disk and either lay it whole or cut it into strips for a lattice top. Crimp the edges to seal the pie.
Lattice Tip: Overlap the strips in a crisscross pattern, alternating over and under for that bakery-level look.
Baking Your Apple Pie to Perfection
Now for the moment of truth.
- Preheat your oven to 425°F.
- Brush the top of your pie with an egg wash and sprinkle with sugar for a golden, sparkling finish.
- Bake for 45-50 minutes, or until the crust is golden and the filling is bubbling.
Pro Tip: Use a pie shield or foil to protect the crust edges from over-browning. You want a golden pie, not a burnt one!
Variations of the Classic Apple Pie Recipe
Why stick with just one version of an apple pie recipe when you can explore different, delicious twists? Each of these variations offers something unique, while still giving you that beloved taste of apple pie. Let’s dive in!
Dutch Apple Pie
A Dutch Apple Pie skips the traditional top crust and replaces it with a crumbly, sweet streusel topping that adds an irresistible crunch.
- Streusel Topping Recipe:
- 1 cup all-purpose flour
- ⅔ cup granulated sugar
- ½ cup unsalted butter (cold, cut into cubes)
- ½ teaspoon cinnamon
How to Make It: Combine the flour, sugar, and cinnamon. Cut in the cold butter until the mixture becomes crumbly. After placing your apple filling in the pie dish, sprinkle this crumb mixture generously over the top. Bake as usual, and you’ll get a pie that’s equal parts tender and crunchy!
Pro Tip: Add some rolled oats or chopped nuts to the streusel topping for extra texture and flavor.
Gluten-Free Apple Pie
Gluten-free doesn’t mean sacrificing a flaky crust! With the right flour blend, you can create a gluten-free apple pie recipe that is just as delicious as the classic.
- Ingredients for Gluten-Free Pie Crust:
- 2 ½ cups gluten-free flour blend (one that includes xanthan gum)
- 1 tsp salt
- 1 cup cold butter, cut into cubes
- 6-8 tbsp ice water
How to Make It: Follow the same method as you would for a traditional pie crust. Just be mindful that gluten-free dough can be a bit more delicate, so handle it gently and chill it before rolling. To ensure a flaky texture, don’t skip chilling the dough at every step!
Pro Tip: Add a tablespoon of apple cider vinegar or lemon juice to help the gluten-free dough hold together better.
Mini Hand Pies
If you’re looking for a portable, snackable version of your apple pie recipe, hand pies are the way to go! They’re perfect for picnics, lunch boxes, or as bite-sized party treats.
- How to Make Mini Hand Pies:
- Roll out your pie dough and cut it into 4- to 6-inch circles.
- Place a spoonful of apple pie filling in the center of each circle.
- Fold the dough over and crimp the edges with a fork to seal.
- Brush with an egg wash and sprinkle sugar on top.
- Bake at 375°F for 20-25 minutes or until golden brown.
Pro Tip: For a fun twist, you can deep-fry the hand pies for a crispy, golden exterior!
Vegan Apple Pie
Making a vegan version of an apple pie recipe is easier than you think. You simply need to swap out butter for a plant-based alternative and use a flax egg in place of a regular egg to bind the dough.
- Vegan Pie Crust Ingredients:
- 2 ½ cups all-purpose flour
- 1 tsp salt
- 1 cup vegan butter, cold and cubed
- 6-8 tbsp ice water
- 1 tbsp ground flaxseed + 3 tbsp water (flax egg)
How to Make It: Prepare the dough as you would normally, using the flax egg as a binder and vegan butter in place of regular butter. The vegan butter will still give you that rich, flaky texture everyone loves in a pie crust!
Pro Tip: Use coconut oil instead of vegan butter for a subtle tropical flavor that pairs well with the apples.
Troubleshooting Common Apple Pie Issues
Even experienced bakers run into pie problems occasionally, but most issues can be easily fixed or avoided with these tips.
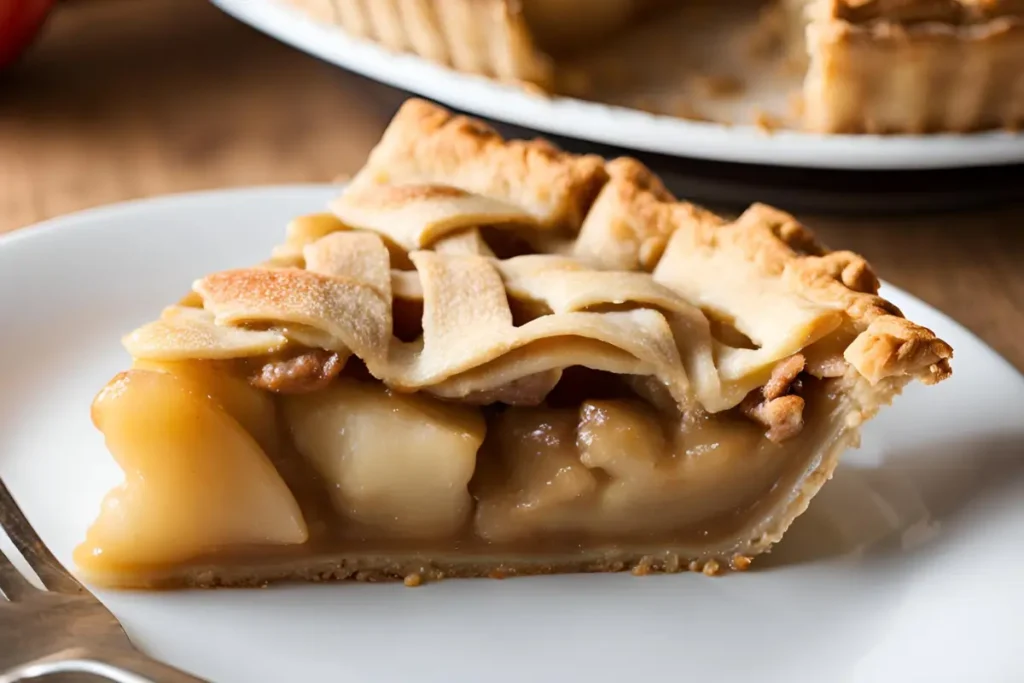
Runny Filling
There’s nothing more disappointing than cutting into a beautiful pie only to find a pool of liquid in the bottom. Here’s how to avoid it:
- Causes:
- Using apples that release too much juice (such as Red Delicious or McIntosh).
- Not using enough thickener (flour, cornstarch, or tapioca).
- Fixes:
- Add 1-2 tablespoons more flour or cornstarch to the filling.
- Pre-cook the apple filling for a few minutes to release some juice before adding it to the crust.
Pro Tip: Let your pie cool completely before slicing. The filling thickens as it cools.
Soggy Bottom Crust
Soggy bottoms are one of the most common complaints in pie-making. No one likes a soggy crust when they’re expecting flakiness!
- Causes:
- The filling is too wet, or the pie wasn’t baked long enough.
- You didn’t blind-bake the bottom crust.
- Fixes:
- Blind Bake: Pre-bake the bottom crust for 10 minutes before adding the filling. To do this, place parchment paper over the crust, fill it with pie weights (or beans), and bake at 375°F for 10-15 minutes.
- Layer Protection: Sprinkle a thin layer of breadcrumbs, crushed graham crackers, or even ground nuts on the bottom crust to absorb extra moisture.
Crust Too Tough
A tough crust is often the result of overworking the dough, causing the gluten to develop too much. We want a flaky crust, not a chewy one!
- Causes:
- Overmixing or over-kneading the dough.
- Not keeping the ingredients cold.
- Fixes:
- Handle the dough as little as possible. Stop mixing as soon as the dough comes together.
- Always chill the dough before rolling it out and after placing it in the pie dish. Cold dough equals flaky crust!
Pro Tip: Use a food processor for mixing dough to avoid overworking it with your hands.
Storing and Reheating Apple Pie
Whether you’re making the pie ahead of time or dealing with leftovers, proper storage ensures that your apple pie recipe stays fresh and delicious.
Storing Apple Pie
- Room Temperature: Cover your apple pie loosely with aluminum foil or plastic wrap and store it at room temperature for up to 2 days. This helps maintain the texture of the crust without it becoming soggy.
- Refrigerator: If you need to store the pie longer, move it to the fridge after 2 days. In the refrigerator, apple pie can last up to 5 days.
Pro Tip: Before serving leftovers, let the pie sit at room temperature for 30 minutes to restore some of its original texture.
Freezing Apple Pie
If you’re planning on freezing your pie, you’re in luck! Apple pies freeze exceptionally well.
- Freezing Baked Pies: Wrap the pie tightly in aluminum foil, then place it in a freezer-safe bag. It will keep for up to 3 months.
- Freezing Unbaked Pies: Assemble the pie, then wrap it in aluminum foil and place it in a freezer-safe bag. When you’re ready to bake, pop it straight into the oven and add about 15 minutes to the baking time.
Pro Tip: If freezing unbaked pies, don’t brush them with an egg wash until right before baking.
Reheating Apple Pie
Want to warm up that leftover pie? Here’s how to do it without turning your flaky crust into a soggy mess:
- Oven: The best way to reheat apple pie is in the oven. Preheat your oven to 350°F and bake the pie for 10-15 minutes until warmed through.
- Microwave: While not ideal, if you’re in a hurry, you can microwave individual slices. Heat them for 20-30 seconds on high, but be aware that this can make the crust less crisp.
Serving Suggestions for Your Apple Pie Recipe
A perfect apple pie deserves the right accompaniments to elevate the experience. Here’s how to serve your apple pie recipe like a pro:
With Ice Cream
Vanilla ice cream is a classic pairing with apple pie. The cool, creamy texture complements the warm, spiced apples, creating a perfect contrast.
- Tip: For something extra special, try pairing your pie with cinnamon or caramel-flavored ice cream.
Cheddar Cheese
Yes, it sounds unusual, but sharp cheddar cheese is a time-honored tradition for many apple pie lovers. The savory, sharp notes of the cheese beautifully balance the sweetness of the pie.
- Tip: Serve a slice of cheese on top of the warm pie or on the side for a delightful flavor combination.
Whipped Cream
Light, fluffy whipped cream adds a delicate contrast to the richness of apple pie. For an extra touch of luxury, make your whipped cream from scratch!
- Tip: Add a dash of cinnamon or vanilla extract to your whipped cream for a spiced twist.
FAQ Section
What are the best apples to use in apple pie?
For a perfectly balanced apple pie, it’s best to use a combination of tart and sweet apples. Tart apples like Granny Smith provide a nice contrast to the sweetness of the filling, while sweet varieties like Honeycrisp, Golden Delicious, or Fuji bring in natural sweetness and juiciness.
- Tip: Mixing different types of apples will give your pie a more complex flavor and prevent it from being too tart or too sweet.
Why is my apple pie filling runny?
A runny filling is usually the result of too much liquid from the apples or not using enough thickener. Apples release juice when cooked, and certain varieties release more than others. If you’re not using enough flour, cornstarch, or tapioca, this liquid can make your filling watery.
- Solution:
- Add 1-2 tablespoons more thickener (like cornstarch or flour) to absorb the excess moisture.
- Pre-cook the apples for a few minutes to release and drain some of their juices before adding them to the pie.
Can I make apple pie ahead of time?
Absolutely! You can prepare an apple pie in advance and either bake it right away or store it unbaked for later.
- Storing Unbaked Pies: Assemble the pie, wrap it tightly in plastic wrap, and store it in the refrigerator for up to 2 days. When you’re ready, pop it in the oven.
- Freezing Unbaked Pies: You can also freeze the assembled, unbaked pie for up to 3 months. Bake directly from frozen but add an extra 15-20 minutes to the baking time.
How do I avoid a soggy bottom crust?
A soggy bottom crust can be disappointing, but there are a few easy tricks to prevent it.
- Blind Bake: Pre-bake the bottom crust before adding the filling. This helps create a barrier that prevents the filling from soaking into the crust.
- Layer Protection: Sprinkle a thin layer of crushed graham crackers, breadcrumbs, or even ground nuts on the bottom of the crust to absorb excess moisture from the filling.
Why is my pie crust tough instead of flaky?
A tough pie crust is often the result of overworking the dough or not keeping the ingredients cold enough.
- Solution: Handle the dough as little as possible and always keep your butter and water cold. Overmixing activates the gluten in the flour, leading to a tough, dense crust. To get that flaky texture, chill the dough at each step (before rolling it out, after placing it in the pie dish, and before baking).
How do I store leftover apple pie?
- Room Temperature: You can store a freshly baked pie at room temperature, loosely covered, for up to 2 days.
- Refrigerator: After 2 days, transfer it to the fridge where it will last for up to 5 days.
- Freezing: If you want to freeze leftover apple pie, wrap it tightly in aluminum foil and freeze it for up to 3 months. When ready to enjoy, thaw it in the fridge overnight before reheating.
What’s the best way to reheat apple pie?
The oven is the best way to revive your pie’s texture without making the crust soggy.
- Oven Method: Preheat your oven to 350°F (175°C) and heat the pie for 10-15 minutes. This will ensure the filling warms up and the crust stays crispy.
- Microwave Method: While faster, the microwave tends to soften the crust. Heat individual slices on high for 20-30 seconds if you’re in a hurry.
Can I make apple pie with store-bought crust?
Yes! Store-bought pie crusts are a convenient time-saver and can still result in a delicious apple pie. Just be sure to follow the package instructions and make any necessary adjustments (such as blind-baking the crust if recommended).
Conclusion
There you have it—the ultimate apple pie recipe guide that guarantees success, whether you’re making it for the first time or the fiftieth. With these tips, tricks, and variations, you’re well on your way to mastering the art of apple pie. And remember, every great pie begins with love (and maybe a good amount of butter).
If you’re craving more indulgent dessert ideas, you have to try this Pecan Pie Pumpkin Cheesecake Recipe. It’s a delightful fusion of creamy pumpkin cheesecake and the sweet, nutty richness of pecan pie—perfect for holiday gatherings or special occasions. And for those who can’t get enough of apple desserts, the Caramel Apple Cheesecake is a must-try. It combines the tartness of apples with a smooth cheesecake base and gooey caramel topping. These decadent recipes will satisfy any dessert lover’s sweet tooth while adding a unique twist to classic favorites.